DIY Epoxy Garage Floor
DIY epoxy garage floor. With the right preparation, tools, and materials, homeowners can create a professional-looking floor without hiring expensive contractors.
An epoxy coating does more than improve the appearance of your garage. It creates a strong, smooth, and protective surface that can handle daily wear and tear. This guide explains everything you need to know about installing an epoxy garage floor yourself, including preparation, materials, application steps, maintenance, and common mistakes to avoid.
What Is an Epoxy Garage Floor?
An epoxy garage floor is a protective coating made by combining epoxy resin with a hardening agent. When these two components mix, they create a chemical reaction that forms a tough, durable layer over concrete surfaces.
Unlike regular paint, epoxy bonds strongly with properly prepared concrete and creates a surface that is resistant to:
- Vehicle traffic
- Oil and grease stains
- Chemicals
- Moisture
- Scratches
- Cracks caused by minor wear
Epoxy floors are popular in garages because they provide both function and style. They are available in different colors, finishes, and decorative options such as metallic effects and colored flakes.
Benefits of Installing a DIY Epoxy Garage Floor
Before starting your project, it is helpful to understand why epoxy flooring has become a popular choice among homeowners.
1. Improved Garage Appearance
A plain concrete floor can make a garage look unfinished and dull. Epoxy coatings create a clean, polished appearance that can completely change the look of the space. You can choose from various colors and add decorative flakes to create a customized design.
2. Long-Lasting Durability
A properly installed epoxy floor can last many years. It creates a hard protective layer that prevents concrete from wearing down quickly. This makes it ideal for garages used as workshops, parking areas, or storage spaces.
3. Easy Cleaning and Maintenance
Concrete floors often absorb liquids, making oil stains and dirt difficult to remove. Epoxy creates a non-porous surface, allowing spills to be cleaned easily with soap and water.
4. Cost Savings
Hiring professionals for epoxy flooring can be expensive. A DIY epoxy garage floor project allows homeowners to save money while achieving impressive results with patience and proper preparation.
5. Increased Home Value
A clean and attractive garage can improve the overall appeal of a home. A well-finished epoxy floor may become a valuable feature for future buyers.
Tools and Materials Needed for a DIY Epoxy Garage Floor
Before beginning your project, gather all necessary supplies. Having everything ready will make the installation process smoother.
Essential Materials:
- Two-part epoxy garage floor coating kit
- Concrete cleaner or degreaser
- Concrete etching solution
- Concrete repair compound
- Primer (if required)
- Decorative flakes (optional)
- Clear topcoat (optional)
Required Tools:
- Broom and dustpan
- Scrub brush
- Pressure washer (optional)
- Paint rollers
- Extension pole
- Paint brushes
- Mixing bucket
- Gloves and safety glasses
- Floor squeegee
- Painter’s tape
Proper safety equipment is also important. Wear protective clothing and ensure good ventilation while working with epoxy products.
Step 1: Prepare the Garage Floor Properly
The preparation stage is the most important part of the entire process. Many epoxy flooring failures happen because the concrete surface was not prepared correctly.
Start by removing everything from your garage. Sweep away dust, dirt, and debris. Clean the entire floor carefully, paying special attention to oil stains and grease spots.
If your concrete has cracks or holes, repair them before applying epoxy. Use a suitable concrete patching product and allow it to fully cure.
After cleaning and repairing, check whether your floor has a smooth or sealed surface. Epoxy needs a slightly rough surface to bond properly.
Step 2: Test the Concrete Surface
A simple water test can help determine whether your concrete is ready for epoxy.
Pour a small amount of water onto different areas of the floor. If the water absorbs into the concrete and creates a dark spot, the surface is likely suitable. If the water forms beads, the concrete may have a sealant that needs to be removed.
Testing helps prevent adhesion problems after installation.
Step 3: Clean and Etch the Concrete
Concrete etching creates tiny pores that allow epoxy to attach firmly to the surface.
Apply a concrete etching solution according to the manufacturer’s instructions. Scrub the floor thoroughly and rinse away all residue. Allow the concrete to dry completely before moving forward.
A clean and properly prepared surface is the foundation of a successful epoxy garage floor.
Step 4: Mix the Epoxy Coating
Most epoxy kits contain two parts:
- Resin
- Hardener
These components must be mixed carefully. Follow the instructions provided with your specific product. Avoid mixing too much material at once because epoxy has a limited working time before it begins to harden.
Mix slowly to reduce air bubbles. Once combined, the epoxy is ready for application.
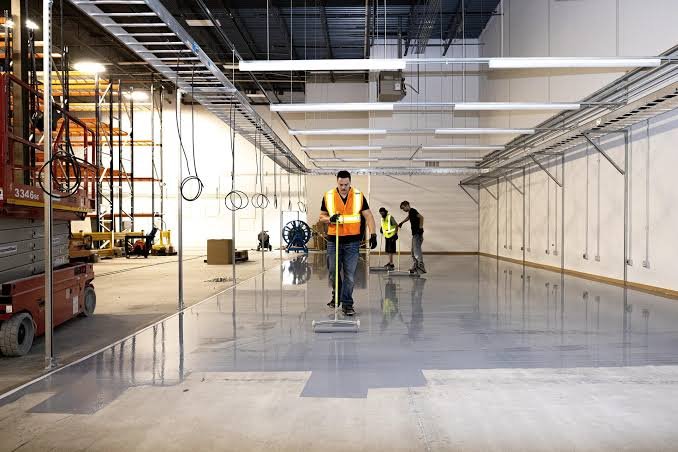
Step 5: Apply the First Coat of Epoxy
Begin by cutting in around the edges of the garage using a brush. Then use a roller to spread epoxy across the main floor area.
Work in small sections and maintain a consistent coating thickness. Avoid leaving puddles or thin areas.
Most epoxy coatings require a specific temperature range for proper curing, so check the product instructions before applying.
Step 6: Add Decorative Flakes (Optional)
Decorative flakes can add texture, color, and a professional appearance to your garage floor.
While the epoxy is still wet, lightly sprinkle flakes across the surface. Allow the coating to cure according to the recommended time.
Flakes also provide extra grip, making the floor less slippery.
Step 7: Apply a Protective Topcoat
Although epoxy itself is durable, adding a clear topcoat can provide extra protection. A topcoat can improve resistance against scratches, UV exposure, and heavy use.
This additional layer is especially useful for garages that experience frequent vehicle movement or workshop activities.
Common DIY Epoxy Garage Floor Mistakes to Avoid
Installing an epoxy floor requires attention to detail. Avoid these common mistakes to achieve better results.
Skipping Surface Preparation
The biggest mistake is applying epoxy without properly cleaning and preparing the concrete. Dirt, oil, and moisture can prevent the coating from bonding correctly.
Applying Epoxy in Poor Weather Conditions
Temperature and humidity affect epoxy curing. Avoid applying epoxy when conditions are outside the recommended range.
Rushing Between Coats
Each layer needs enough time to cure. Applying additional coats too quickly can weaken the final result.
Using Low-Quality Products
Cheap epoxy products may not provide the durability needed for garage conditions. Choosing a reliable coating system can improve performance.
Ignoring Moisture Problems
Concrete floors can contain moisture that damages epoxy coatings. Check for moisture issues before installation.
How Long Does a DIY Epoxy Garage Floor Last?
The lifespan of an epoxy garage floor depends on several factors, including preparation quality, product type, and usage.
A well-installed residential epoxy floor can often last between 5 and 10 years or longer with proper care. Garages with heavy equipment, frequent vehicle traffic, or harsh chemicals may require maintenance sooner.
Regular cleaning and avoiding unnecessary damage can extend the life of your floor.
How to Maintain an Epoxy Garage Floor
Maintaining an epoxy floor is simple compared to untreated concrete.
Follow these tips:
- Sweep regularly to remove dirt and debris.
- Clean spills quickly, especially oil and chemicals.
- Use mild cleaners instead of harsh chemicals.
- Avoid dragging heavy objects across the surface.
- Place protective mats under vehicles or equipment when needed.
With basic care, your epoxy floor can continue looking attractive for many years.
Is a DIY Epoxy Garage Floor Worth It?
A DIY epoxy garage floor is a rewarding home improvement project for people who enjoy hands-on work. It requires time, preparation, and attention to detail, but the results can dramatically improve your garage.
The biggest advantages are affordability, durability, easy maintenance, and a professional-looking finish. While the installation process may seem challenging at first, following the correct steps can help you achieve a strong and attractive garage floor without professional installation costs.
Final Thoughts
A DIY epoxy garage floor is one of the best ways to upgrade an ordinary concrete garage into a cleaner, stronger, and more attractive space. The key to success is careful preparation, choosing quality materials, and following the correct application process.
Whether you use your garage for parking, storage, hobbies, or a workshop, an epoxy coating can provide a durable surface that improves both appearance and functionality. With patience and proper planning, you can create a garage floor that looks professional and lasts for years.